
5v5 · Formation guide
The 1-2-1
One diamond. Passing options all around the ball.
An illustrated guide to the starting shape, four playing principles and a role for every player.
Chapter 1
Starting shape
A starting diamond, not a set of fixed spots. Every player gets to attack and defend.
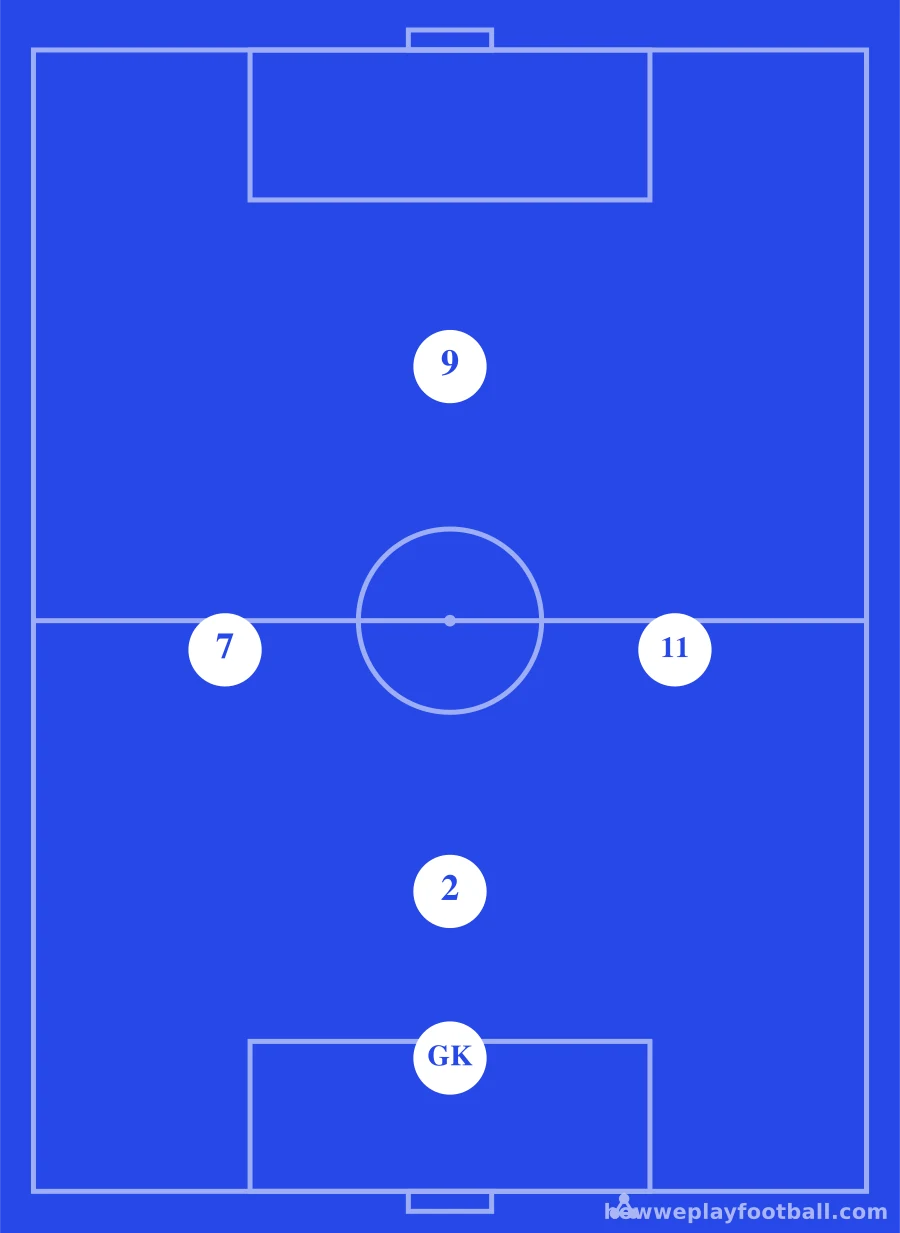
This shape gives us
- a teammate behind and ahead of the ball
- two wider passing options
- simple chances to combine in twos
- a starting point for supporting and recovering
Our spine runs through the middle: Goalkeeper, defender and forward; the two wider players provide angles.
- Notation
- 1-1-2-1 including goalkeeper · 1-2-1 outfield
- Goalkeeper
- 1
- Outfield players
- 4
Chapter 2
Four playing principles
Four choices to notice and practise in games.
- Give an angle
Move to a clear space where your teammate can see you.
“Can you see me?” - Show them wide
Use the full width and leave room to dribble.
“Can we make the pitch bigger?” - One goes, one covers
The nearest player can meet the ball while the defender protects the centre.
“Who goes? Who protects?” - Recover together
The nearest player slows the attack and teammates get back to help.
“Where can I help?”
The Coaching Notes
Enjoying this guide? Get the next one.
New formation guides and practical coaching ideas, straight to your inbox. Free and occasional.
Chapter 3
A job for every player
A starting responsibility, with the freedom to learn another.
Chapter 4
Playing together
How the team supports one another in possession and after the ball is lost.
A quick reminder for the touchline. Choose a principle or partnership to explore the full coaching detail.
With the ball
Without the ball
The playbook
Printable 1-2-1 playbook
The printable guide isn't released yet.
More features for this formation, such as restarts and matchday guidance, will be added only once they've been written and reviewed.